
Starting a DIY roofing project can be an ambitious yet rewarding endeavor. However, the complexities and the dangers of working at heights demand a strict adherence to safety protocols. Our detailed guide outlines seven critical safety tips. They range from proper gear selection to ensuring a clean work environment, each designed to mitigate potential hazards effectively. As you consider taking on your roofing project, understanding and implementing these precautions is essential. But what specific risks do these guidelines address, and how can they transform your approach to DIY roofing? Let’s explore how these strategies can greatly enhance your safety and project outcome.
Wear Proper Safety Gear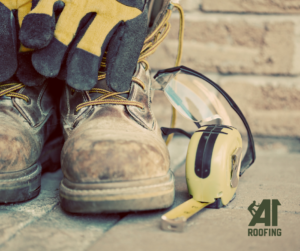
Wearing important safety gear is vital when undertaking DIY roofing projects to guarantee protection against common hazards. Among the primary concerns are risks related to falling objects, debris, and missteps that can lead to severe injuries. Therefore, selecting the right gear is not only about compliance with safety protocols but also about personal security and efficiency during work.
Eye protection is essential. Roofing activities often generate dust, wood shavings, and other particulates that can pose serious risks to your eyes. Safety goggles or glasses with side shields are recommended to offer thorough protection against such hazards. Make sure that the eyewear fits snugly and provides a clear field of vision to maintain awareness of your surroundings.
Footwear choices are equally important. The ideal roofing shoes will have rubber soles for maximum grip and traction. This helps prevent slips and falls, especially on steep or slick surfaces. The footwear should also have a sturdy construction to protect against punctures from nails or sharp objects. Additionally, they should provide sufficient ankle support to stabilize movements on uneven roofing structures.
Check Weather Conditions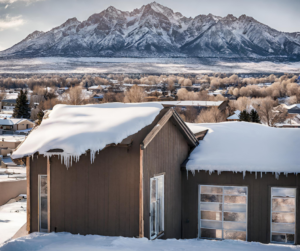
Before starting any DIY roofing project, it is important to check local weather forecasts to confirm conditions are safe for working at heights. Weather can greatly affect the safety and efficiency of roofing tasks. High winds, for instance, not only pose a direct risk of you falling but can also make materials like shingles or tools unstable or uncontrollable. Rain and even a light drizzle increase the risk of slips and falls as surfaces become slippery.
Seasonal planning is essential when scheduling any roofing work. For example, late spring through early fall typically offers more predictable, mild weather, reducing the likelihood of sudden storms or extreme temperatures. Temperature impacts are also significant; both high and low temperatures can affect the installation process of materials like asphalt shingles, which require certain conditions to seal properly.
Always monitor the weather leading up to the project and have a contingency plan for unexpected changes. It is advisable to avoid roofing during periods of fluctuating or severe weather forecasts. Remember, no roofing job is so urgent that it cannot wait for safe weather conditions. Ensuring that you choose the right time for your roofing project can mean the difference between a successful repair and a hazardous situation.
Secure Your Ladder
To guarantee safety during your DIY roofing project, start by properly securing your ladder to prevent any movement that could lead to falls. Begin with a thorough ladder inspection. Check each rung to make sure they are intact and firmly attached. The feet of the ladder should be sturdy and not worn out, providing a stable base. If any part of the ladder is damaged or questionable, do not use it until it has been repaired or replaced.
Next, focus on the anchoring methods. Always place the ladder on a firm, level surface. Avoid muddy or unstable ground which can cause the ladder to shift or sink. Utilize a ladder stabilizer or standoff, which extends the top of the ladder away from the wall, providing a more secure and stable setup. Secure the base of the ladder with sandbags or specially designed ladder anchors to prevent slipping or sliding.
Additionally, make sure the ladder extends at least three feet above the edge of the roof. This overhang allows for safer and easier shifts from the ladder to the roof and back. By meticulously adhering to these steps, you greatly reduce the risk of accidents, ensuring a safer DIY roofing endeavor.
Use Safety Harnesses
When undertaking DIY roofing projects, selecting the appropriate safety harness is essential for preventing falls and ensuring overall safety. The correct harness must fit securely and comfortably, supporting the body in case of a slip or fall. Equally important is mastering proper harness attachment techniques, which involve securely fastening the harness to a reliable anchor point to maintain stability at heights.
Choosing the Right Harness
Selecting an appropriate safety harness is crucial for guaranteeing maximum protection and comfort during roofing projects. When choosing a harness, focus first on harness durability and adherence to certification standards. A durable harness should be made of high-quality, robust materials capable of withstanding harsh weather conditions and the wear and tear of frequent use. Make sure that the harness you select meets all relevant safety standards, such as those set by OSHA or ANSI. These certifications indicate that the harness has undergone rigorous testing for strength, durability, and safety. Additionally, consider a harness that offers adjustable features to fit different body types and sizes, ensuring that it can be comfortably and securely worn by any user.
Harness Attachment Techniques
Properly attaching your safety harness is essential for ensuring the utmost safety during roofing projects. Begin by conducting a thorough harness inspection to check for wear, tear, or defects. Focus particularly on the integrity of attachment points, which are critical for reliable performance. Securely fasten the harness around your body, ensuring that all straps are snug but allow for full range of motion. Attachment points should be positioned to maintain balance and prevent falls. Connect the lanyard to a secure anchor point capable of supporting at least 5,000 pounds. Double-check all connections and adjust as necessary before beginning work. Remember, correct harness attachment is not just a precaution—it’s your lifeline when working at heights.
Keep the Roof Clean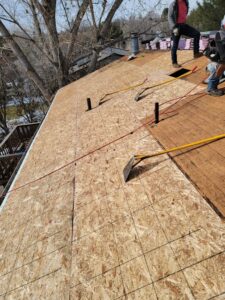
Maintaining a clean roof surface is vital for guaranteeing long-term durability and preventing damage. Regular debris removal is essential; leaves, twigs, and other materials can accumulate, especially in valleys and gutters. These accumulations retain moisture and can lead to mold growth and rot, which compromises the roofs integrity. Begin your cleaning process by safely using a ladder to access the roof. Use a soft broom or a leaf blower for the removal of debris; be gentle to avoid damaging the roofing material.
Slip prevention is another critical aspect of keeping the roof clean. A clutter-free roof not only extends its lifespan but also minimizes the risk of slips and falls. Ensure that all moss and algae, which can create slippery surfaces, are promptly removed. Utilize a moss remover suitable for your roofing material, apply it according to the manufacturer’s instructions, and gently scrub or rinse it off. Always wear shoes with good traction and consider laying down safety ropes or wearing a harness for added security.
Follow Material Guidelines
After ensuring your roof is clean and free from debris, it is important to follow specific material guidelines to safeguard the structure and enhance its longevity. Proper material selection and storage are pivotal to guarantee safety and effectiveness in DIY roofing projects.
When purchasing materials, opt for high-quality products specifically designed for roofing. These materials should comply with local building codes and manufacturers’ specifications. It is advisable to consult with professionals or experienced retailers to make informed choices about shingles, underlayment, sealants, and other necessary components. Make sure that the materials you select are suitable for your roof’s pitch and local climate conditions.
Material storage is equally vital. Store all roofing materials in a dry, secure location to prevent damage and degradation. Keep heavy materials close to the roof access point to minimize the need to carry them across the roof, reducing the risk of accidents. Stack materials flat and ensure they are properly supported to avoid any shifting or collapsing stacks, which can be hazardous.
Plan Your Exit Strategy
Before commencing any roofing work, it is essential to establish a safe descent route to guarantee a secure and efficient exit from the roof. This strategy not only prioritizes your safety but also enhances the overall efficiency of the project by minimizing risks associated with emergency evacuations. Additionally, it is vital to clearly communicate and understand the emergency procedures among all participants to handle unexpected situations effectively.
Select Safe Descent Route
Identify and establish a secure descent route before beginning any roof work to establish a safe exit strategy. Assess the roof gradient carefully; steeper slopes require more meticulous planning and potentially additional descent tools to guarantee safety. Use ladders that are appropriately rated for your weight plus any equipment you carry. Position them so they extend at least three feet above the landing for easy and safe access. Secure the base against slipping and the top against side-to-side movement. Consider the use of roof anchors and harnesses as part of your descent tools, especially on higher or steeper roofs. Plan your descent route to be clear of obstacles and hazards, ensuring it remains consistent and accessible throughout your DIY roofing projects.
Communicate Emergency Procedures
Establish clear and concise emergency procedures to guarantee swift and safe reactions in any unexpected situation during your roofing project. Begin by designating a list of emergency contacts, including local emergency services, a nearby hospital, and a trusted individual who can assist if needed. Make sure that this information is easily accessible to everyone involved in the project. Additionally, invest in basic first aid training for all team members. This training can be vital in managing minor injuries on-site until professional medical assistance is available. Outline specific steps for different scenarios, such as falls, weather emergencies, or equipment failures. Regularly review these procedures with your team to ensure everyone understands their role in a crisis.
The complexity of roofing systems requires a deep understanding of materials, techniques, and local building codes, which DIY enthusiasts typically lack. Hiring A1 Roofing ensures that your roofing project is handled with expertise, precision, and a commitment to safety. With a proven track record and a team of skilled professionals, A1 Roofing guarantees high-quality workmanship, adherence to safety standards, and the peace of mind that your roof will stand the test of time. Choose A1 Roofing for reliable, efficient, and expert roofing solutions.